 November 21, 2016|
How to Setup WordPress on Amazon EC2 in 5 minutes
Sometimes I need to setup WordPress on AWS, some of my clients used AWS as their hosting, maximum number of client purchase domain from Name Cheap or GoDaddy, I setup AWS as their hosting. To make these easy for you I am going to create the step-by-step guide, which will help you to setup WordPress on Amazon EC2 yourself. I will show you how to configure, how to launch EC2 instance, how to setup WordPress, how to get your WordPress username and password etc. possibly everything, you will need.
Step 1: Login to EC2 Dashboard and Launch Instance
To start, we need to login on AWS, please login to your AWS Management Console or get registered. When Amazon Web Services opened, find EC2 under Compute and click there to open.
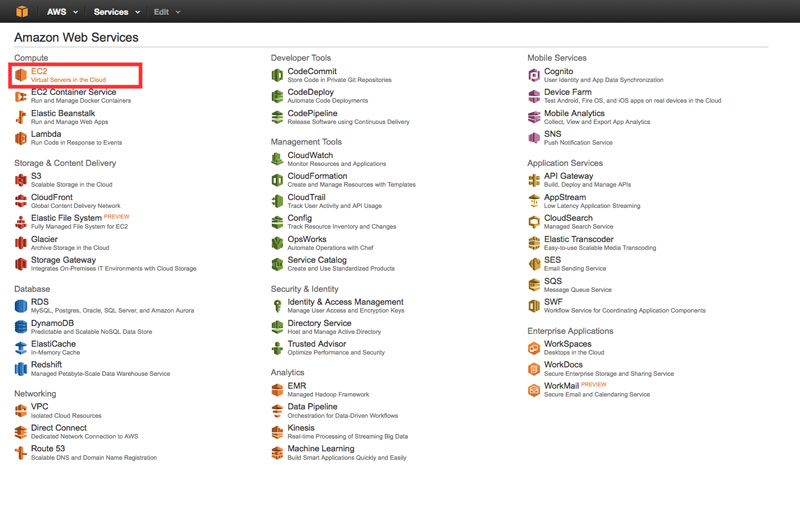
On the EC2 dashboard, you will get Launch Instance, click on Launch Instance to create and configure your virtual machine.

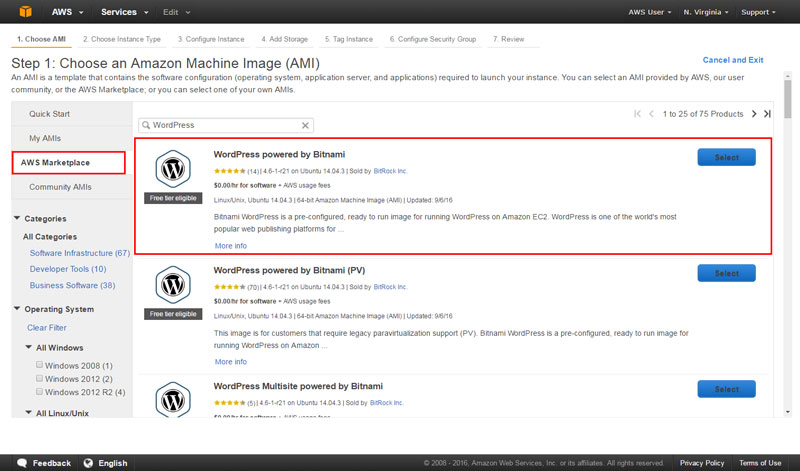
Step 2: Create and Configure your Instance
-
- Click on AWS Marketplace on the left side, on the search field write WordPress, look for WordPress powered by BitNami, click on Select.
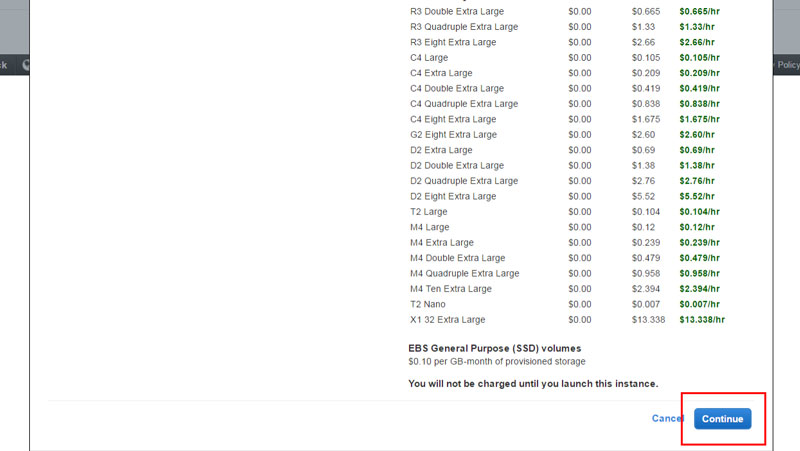
-
- Then there will show pricing, WordPress is free. Scroll to the bottom and click on continue.
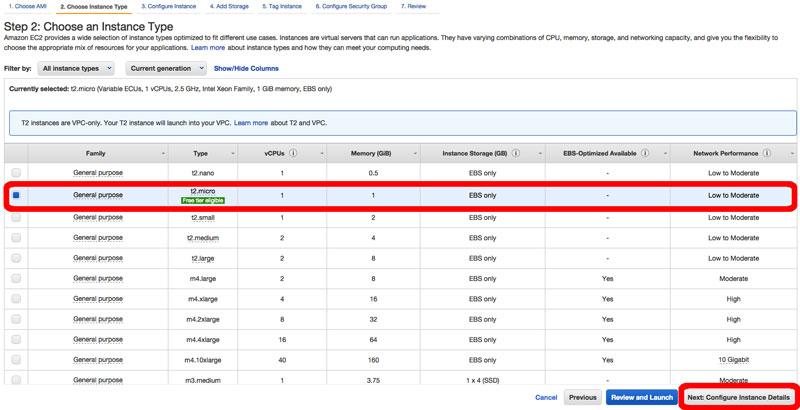
-
- There will show instance types, I am going for free one t2.micro instance (you can choose as needed), select t2.micro then click on Next: Configure Instance Details.
-
- On the following screens, click on Next: Add Storage, you can use default storage.
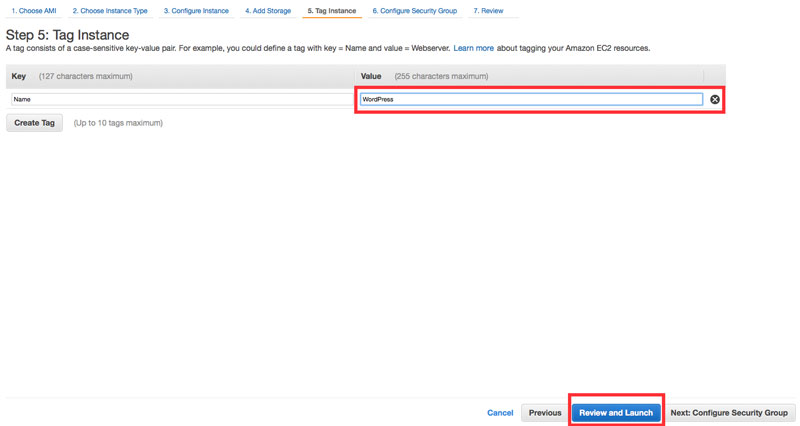
- Then Next: Tag Instance. Please set a name, can be your site name or something (this name will show on your list of instance). Put a name there, I am entering WordPress in the value. Then Click on Review and Launch to continue.
-
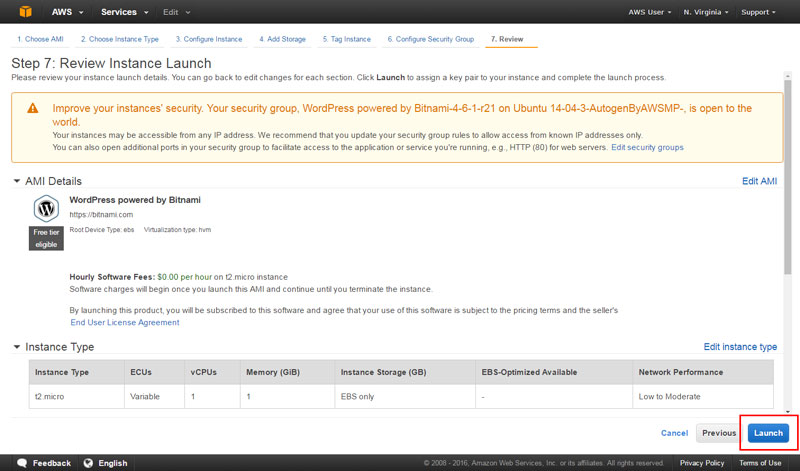
- You can review you instance configurations again, then click Launch.
-
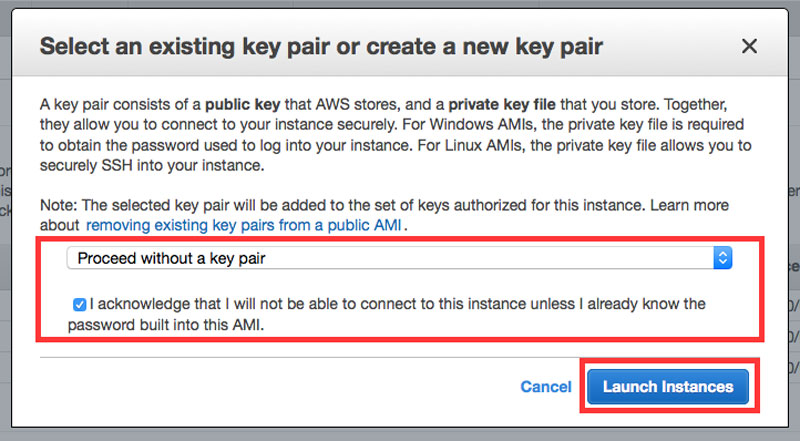
- On the next screen, there will come select Key Pair. Key-Pair is a file which will help work same as FTP/SSH password, don’t forget to keep backup of this file, this is very important to login via FTP further. Create one key-pair, give there any name (not for each time, you can use same key-pair for different instances), then click on download and check the box acknowledge. Even you can go forward without key-pair. From my experience creation of key-pair at least one, that will be great for you. Then click on Launch Instances.
-
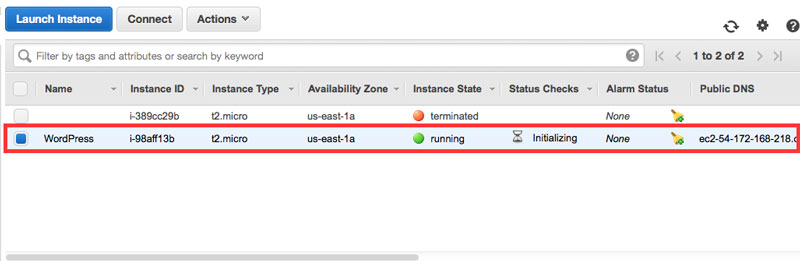
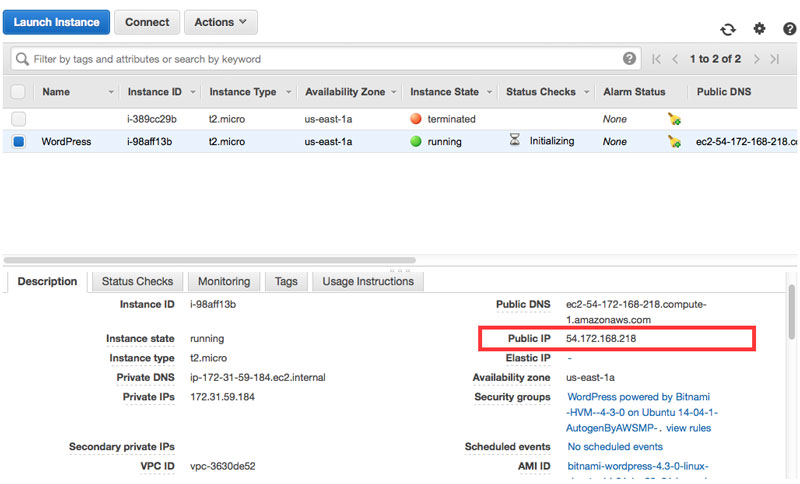
- Click on View Instances, on the bottom right of the page. Then click on WordPress or whatever we created recently. There will be some details on the bottom for this instances. Find Public IP. Copy that IP and paste on different browser or on new tab and browse. You will get WordPress installed there. So we are done! If you face any problem, please wait few minutes more to be setup everything. If still problem, then start from the first step again. Still problem? Don’t forget to ask me via comment here, I will reply you as soon as possible or mail me via our official email address.
Step 3: How to Find WordPress Access
Our WordPress already setup and running. Now we need to WordPress access for login to WordPress dashboard.
-
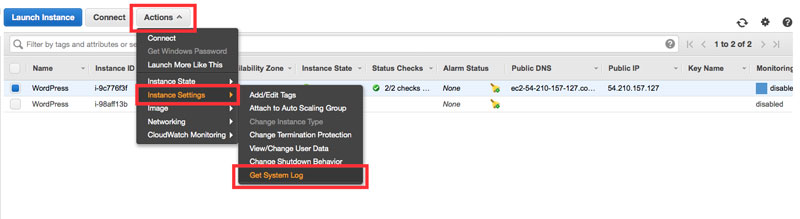
- Select WordPress instance (if you are not here, just switch back to EC2 management console), then click on Actions button, on that drop down menu select Instance Settings, then choose Get System Log.
-
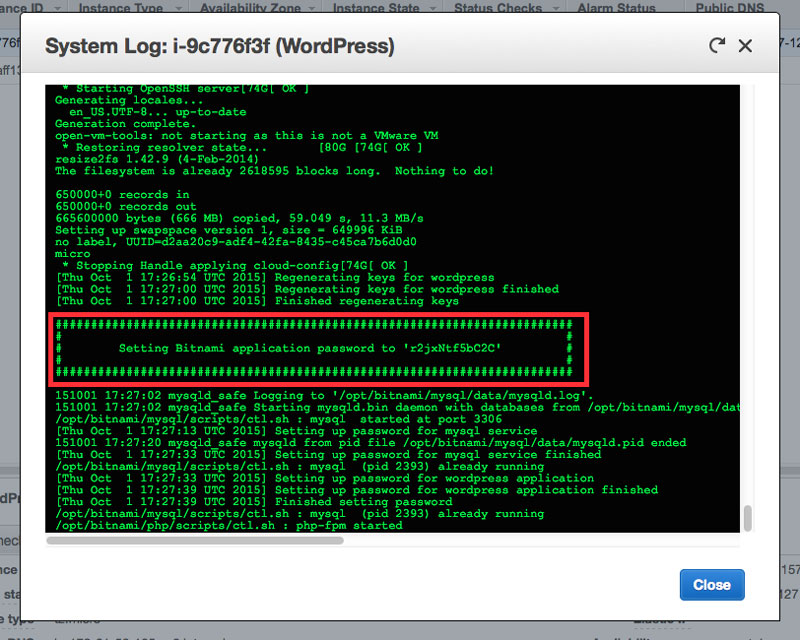
- On the System Log window, scroll down to the bottom and find the password, surrounded by hash marks.
-
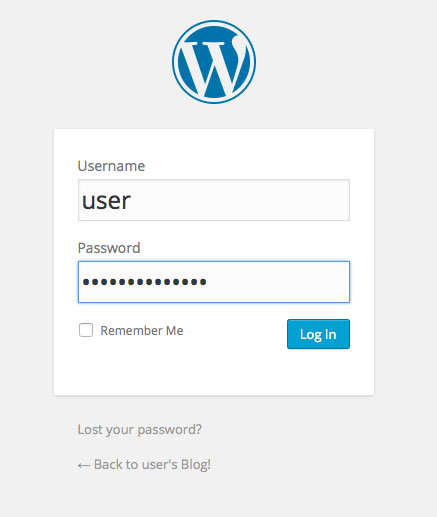
- Now to your public IP, where we recently installed WordPress, add /admin just after your public IP, like this one: 54.192.32.144/admin and browse.
- Enter your username user and the password what we got from System Log window.
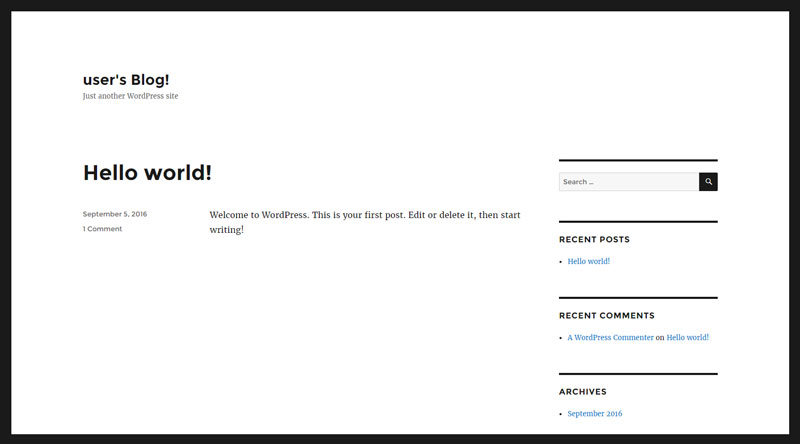
Congratulations! WordPress installed WordPress and can access. We are done!
Step 4: How to Point this WordPress with your Domain
Go to your domain panel or DNS settings from cPanel, look there is an IP pointed to your domain using A Record. Just copy this public IP and replace with old one, then browse your domain, you will get the same what was getting on public IP, is it? So we are done completely. Don’t forget to give me thanks via comment that will inspire me to write more and more.