 July 02, 2022|
How to create WordPress menu? WordPress Menu Bar
A menu on a website helps a visitor to navigate easily. In this article, we will learn how to create a WordPress navigation bar or menu bar.
How to create a WordPress menu
First, go to Menu option from the Appearance option from your WordPress dashboard. After going to the Menu option you will find a page like this. As you don’t have any menu created, you need to create one.
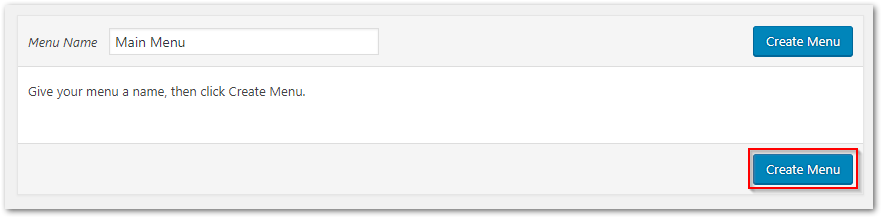
Name your menu and press the Create Menu button. If your theme has multi-menu sections you can create different menus from here. For example, one for the header and one for the footer.
Now as you created a new menu you will see the option to set menu items on left.
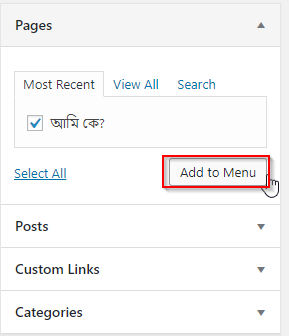
You can add page, posts, categories or custom links to your menu.
After clicking the ADD TO MENU button you will see your menu items on right.
(If you want to add your new pages automatically to your menu you can tic the Auto add pages option from the Menu settings option)
Basically, a web page contains these items on the menu bar.
- Home
- About
- Contact
- Privacy Policy
- Terms and Conditions
- Services
- Blog
- Categories
- Sitemap etc.
It’s completely depends on the category of your site.
You can create sub menu by dragging them.

When you complete your editing, save your settings by clicking the Save Menu button.
WordPress Menu Location
You can locate your menu in two ways. By theme options page or the Manage Locations option. Theme option settings depend on the theme that you are using. An easy step is going to Manage Location tab from the right and select your menu from there.
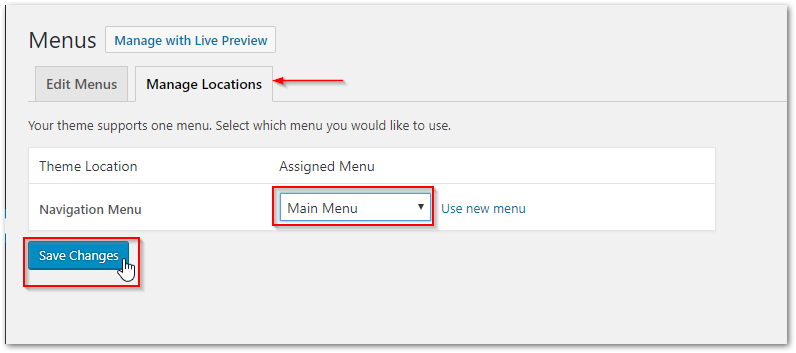
Now click the Save Changes button and you will see your menu working on live.